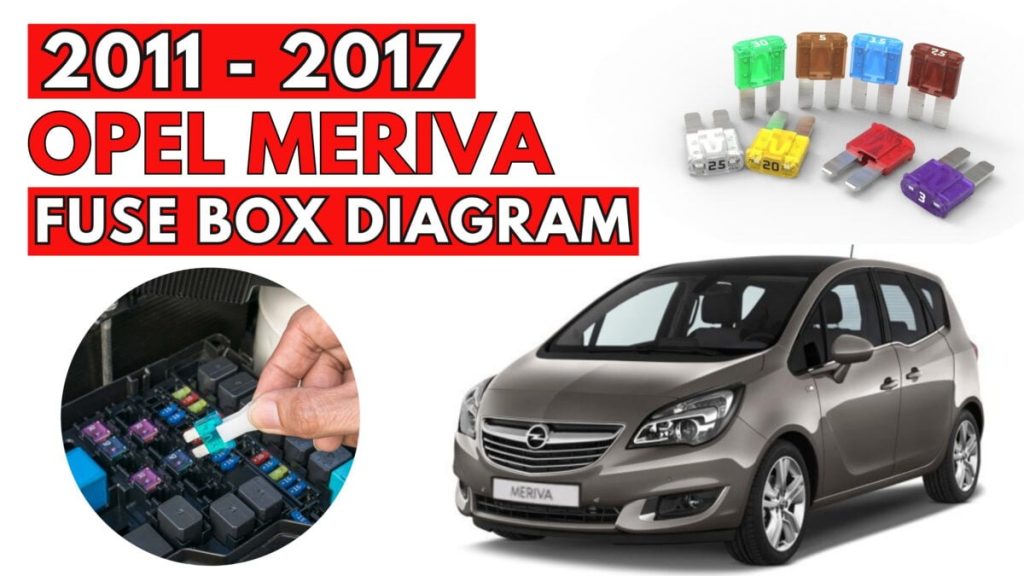
Opel Meriva (2011 – 2017) Fuse Box Diagrams & Location
For the second-generation Opel Meriva (2011–2017), understanding the fuse box layout is essential to resolve electrical faults. This guide includes accurate diagrams and fuse positions, making it easier for owners to locate components and ensure the car’s systems operate smoothly.
Instrument Panel Fuse Box
Opel Meriva (2011 to 2017)
Fuse box location
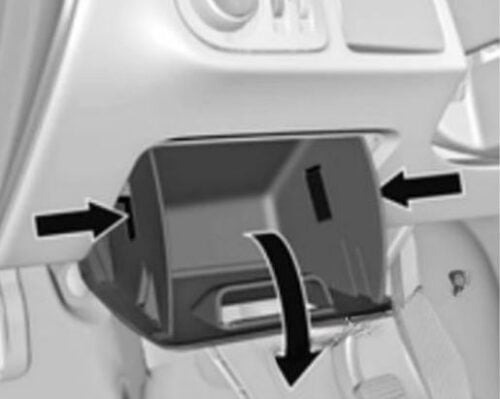
In left-hand drive vehicles, the fuse box is behind the storage compartment in the instrument panel.
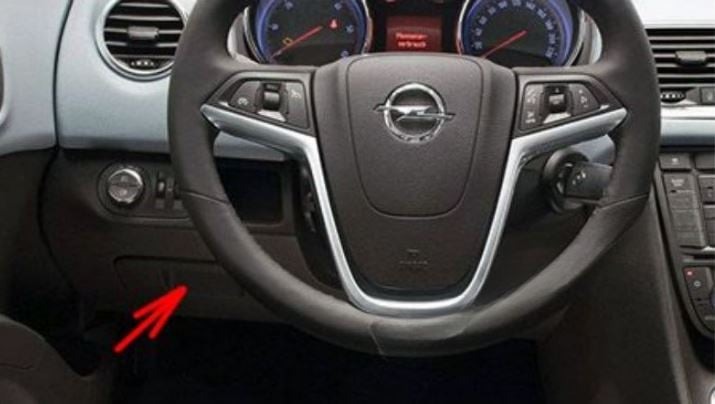
Open compartment, compress the locking tabs, fold compartment down and remove.
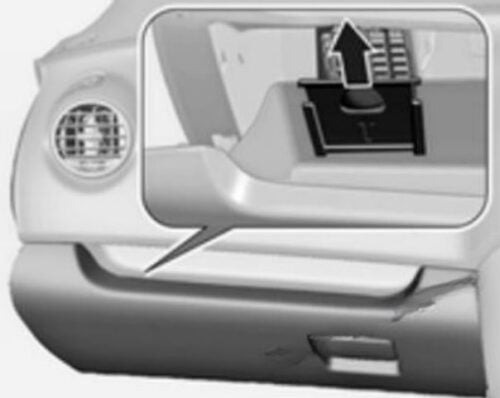
In right-hand drive vehicles, it is located behind a cover in the glovebox
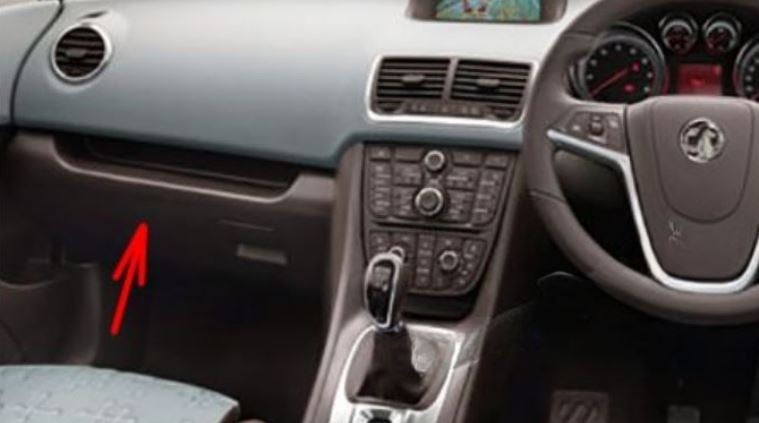
Open the glovebox, pull cover upwards and remove.
Fuse Box Diagram
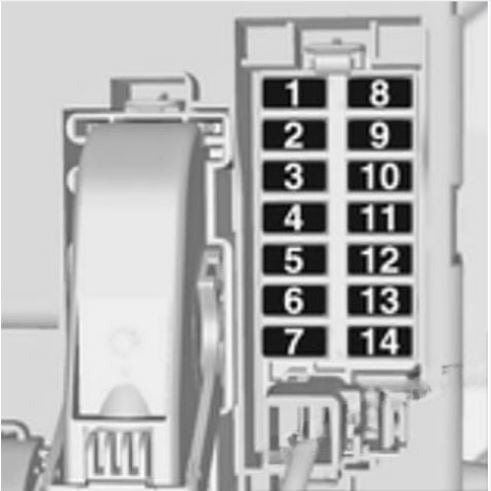
Assignment of the fuses in the instrument panel (2011 and 2012)
| No | Circuit |
|---|---|
| 1 | Rear left door unlocking |
| 2 | Display, instrument, telephone |
| 3 | Radio |
| 4 | Ignition switch, immobiliser |
| 5 | Windscreen washer, rear screen washer |
| 6 | Central locking system, tailgate |
| 7 | Central locking system |
| 8 | Rear right door unlocking |
| 9 | Courtesy light |
| 10 | Heated steering wheel |
| 11 | – |
| 12 | – |
| 13 | Rain sensor, interior mirror, outside mirrors |
| 14 | – |
Assignment of the fuses in the instrument panel (2013 to 2017)
| No | Circuit |
|---|---|
| 1 | Radio |
| 2 | Display/lnstrument/Telephone |
| 3 | Radio |
| 4 | Ignition switch/lmmobiliser |
| 5 | Windscreen washer/Rear screen washer |
| 6 | Central locking system/Tailgate |
| 7 | Central locking system |
| 8 | Display/lnstrument/Telephone |
| 9 | Heated steering wheel |
| 10 | Rear left door unlocking |
| 11 | Rear right door unlocking |
| 12 | Courtesy light |
| 13 | Rain sensor/Interior mirror/ Exterior mirrors |
| 14 | – |
Engine Compartment Fuse Box
Opel Meriva (2011 to 2017)
Fuse Box Location
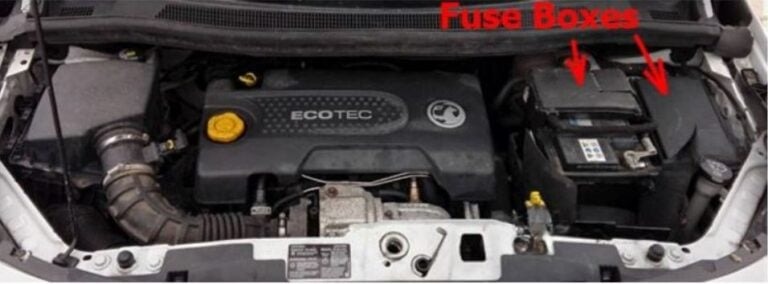
The fuse boxes is in the front left of the engine compartment.
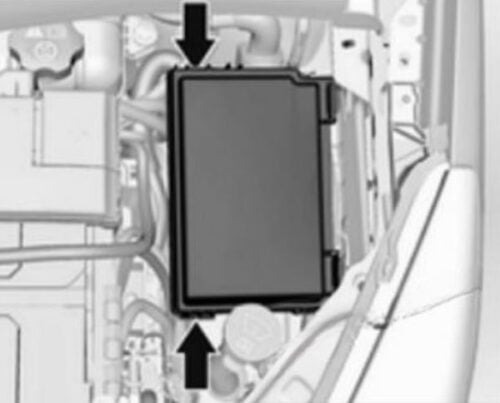
Disengage the cover, lift it upwards and remove.
Fuse Box Diagram
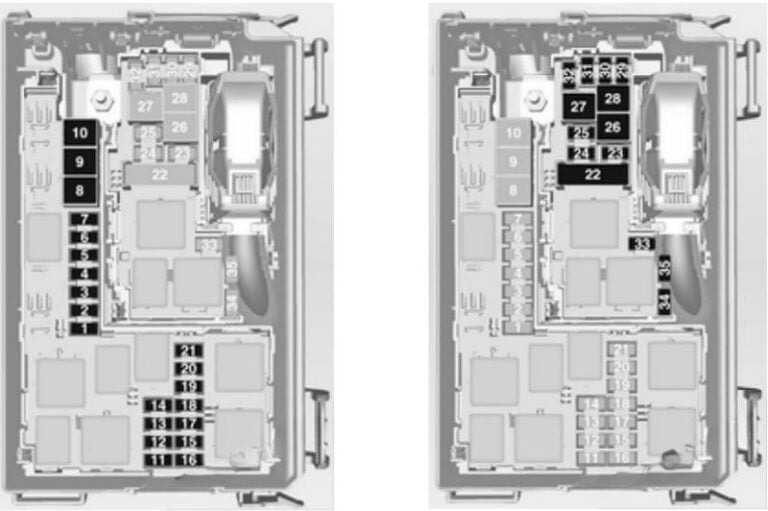
| No | Circuit |
|---|---|
| 1 | Starter |
| 2 | – |
| 3 | Fuel filter/Cooling |
| 4 | Horn |
| 5 | Terminal 30 |
| 6 | Engine control module/Transmission control unit |
| 7 | Fog light |
| 8 | Engine cooling |
| 9 | Engine cooling |
| 10 | Vacuum pump |
| 11 | Ignition/Preheating |
| 12 | Headlamp levelling |
| 13 | Air conditioning system/ Terminal 15 |
| 14 | Transmission control unit |
| 15 | High beam right |
| 16 | High beam left |
| 17 | Engine control module |
| 18 | Engine control module/ Terminal 15 |
| 19 | Airbag |
| 20 | Engine control module |
| 21 | Engine control module/ Terminal 87 |
| 22 | Electrical parking brake |
| 23 | Tyre repair kit |
| 24 | Fuel pump |
| 25 | ABS |
| 26 | Heated rear window |
| 27 | ABS |
| 28 | Interior fan |
| 29 | Cigarette lighter |
| 30 | Air conditioning system |
| 31 | Front power window, left |
| 32 | Front power window, right |
| 33 | Mirror heating |
| 34 | ABS |
| 35 | Airbag |
Fuses on the battery
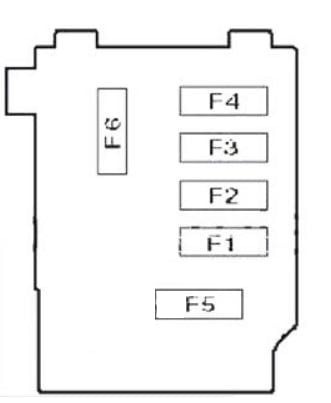
| No | Circuit |
|---|---|
| F1 | (80A) |
| F2 | (100A) Load compartment fuse box |
| F3 | – |
| F4 | (80A) Power steering |
| F5 | (250A) |
| F6 | (300A) Starter |
Load Compartment Fuse Box
Opel Meriva (2011 to 2017)
Fuse Box Location
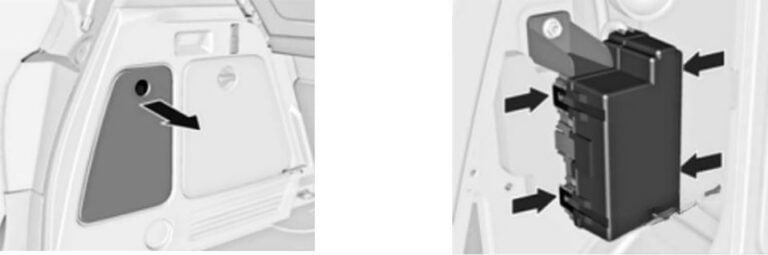
It is on the left side of the load compartment behind the cover.
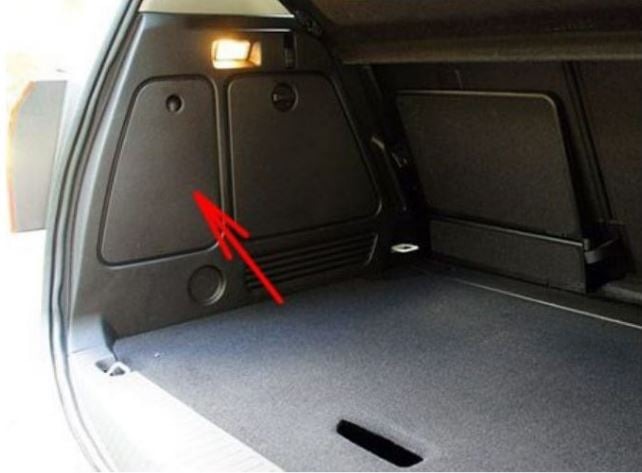
Remove the cover, disengage the four retaining lugs and remove the cover.
Fuse Box Diagram
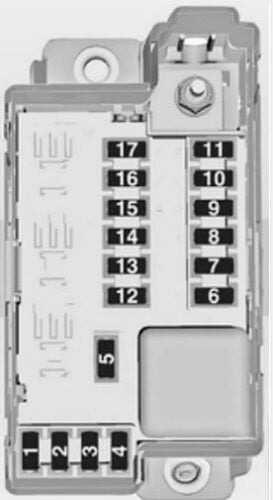
| No | Circuit |
|---|---|
| 1 | – |
| 2 | – |
| 3 | – |
| 4 | – |
| 5 | Adaptive forward lighting |
| 6 | Right rear power window |
| 7 | Adaptive forward lighting |
| 8 | Trailer module/Trailer socket |
| 9 | Left seat lumbar support |
| 10 | Left rear power window |
| 11 | Park assist |
| 12 | Electrical sunblind |
| 13 | – |
| 14 | Heated front seats |
| 15 | Trailer module |
| 16 | Right seat lumbar support |
| 17 | – |